Paper Projects

Karaoke & Cards Vintage Victorian Party Invitations

Karaoke & Cards Vintage Victorian Party Invitations

To properly announce any ball, you need an impressive invitation! So when I was planning my Victorian themed Karaoke & Cards Cocktail Party, I knew that the invitation to announce it would need to be pretty, informative, and most of all, floral! After a few hours of design, printing, cutting, and assembling, these mismatched floral Vintage Victorian Party Invitations were ready to send out to all my favorite people!

Read More

DIY Patterned Paper Envelope Liners & Invitation Mats

DIY Patterned Paper Envelope Liners & Invitation Mats

For my Vintage Victorian Karaoke & Cards Cocktail Party, mismatched florals were the name of the game! So when I found a bunch of beautiful floral scrapbook paper it became the perfect time to start making more stationery details and create a staple for my future paperie projects. After creating custom Floral Patterned Playing Cards with part of my paper, I picked my favorite prints to turn into a personalized patterned detail on my guests invitations, Patterned Paper Invitation Mat and Envelope Liners.

Read More

DIY Wax Stamp Floral Patterned Playing Cards

DIY Wax Stamp Floral Patterned Playing Cards

While I was creating all sorts of mismatched floral stationery and details for my latest party, I just had to share one of my favorites before the festivities started, featuring some of my own favorite things; florals and beautiful wax stamps! With my next party full of fun and games, my first project featuring all the wax seals I’ve made so far are kicking off with these Personalized Wax Stamp Floral Patterned Playing Cards.

Read More

DIY Tissue Paper Circle Photo Booth

DIY Tissue Paper Circle Photo Booth

Every great party needs a photo booth! Whether it's a wedding, bachelorette party, bridal shower, baby shower or anything in between, having a decorated wall that your guests can pose in front of is always a crowd pleaser! There’s so many photo booth options out there so for my first homemade photo booth, I wanted something easy to make but that would be a fun textured backdrop that could be used for a variety of events. Enter this tissue paper circle photo booth, with its layers of inexpensive tissue paper turning my blank wall into a light and bright backdrop for fabulous photos!

Read More

DIY Glitter Metallic Flake Self Adhesive Wax Seals

DIY Glitter Metallic Flake Self Adhesive Wax Seals

For that extra bit of glitz and glam, nothing adds sparkle like a glittery design detail! So as I learned about the basics of wax seal making as I created my Simple Self Adhesive Wax Seals and my Marbled Self Adhesive Wax Seals,  I started experimenting with other details to add to my seals to give them some extra pizazz, starting with some metallic flake rose gold glitter. I gathered a bunch of my favorite bold and blank wax stamps, started sprinkling glitter everywhere, and from my fun a variety of metallic flake covered Glitter Self Adhesive Wax Seals were created for my future holiday and birthday stationary projects!

Read More

DIY Heart Wine Glass Place Cards

This post contains affiliate links, meaning that if you click on a link I will recieve a small comission. This costs you nothing extra and I only promote products I use and love! You can read our full disclosure here

DIY Heart Wine Glass Placecards #svgfiles #cricutprojects #placecards

What better way to adorn your wine glasses in this lovely Valentine’s Season! I’m on a heart kick right now, probably due to really wanting to have a Galentine’s Brunch. :) For Galentine’s Day, Valentines Day, or any Wedding Celebration; these place cards are a cute and fun way to give your guests a glass and their table information.

DIY Heart Wine Glass Placecards #svgfiles #cricutprojects #placecards

I’ve made a couple place cards before but I want to try some Wine Glass Place cards again, but this time cutting them so they could sit on the edge of the glass. I started with a simple heart place cards that can easily be handwritten with your guest information. These ones are super simple, literally cut out, slight fold, and ready to go! :)

DIY Heart Wine Glass Placecards #svgfiles #cricutprojects #placecards

Supplies:
White Cardstock
Craft Cutter and Tool Set
Adhesive Mat
Heart Place Card Design File

DIY Heart Wine Glass Placecards #svgfiles #cricutprojects #placecards

1. After downloading the cut files, import them into the Cricut Software. After creating a new project, select Upload Image. Select the file you wish to upload and it will automatically take you to the final upload screen, where you can name the file the select Save.  Copy and Paste the design for as many placecards as you want (1 standard sheet of paper will fit 6 hearts).

2. Cut the design(s) in your choice of card stock with the Light Card stock Setting on your Cricut. The SVG Files are sized so that they will automatically cut to the size you see in the photos, but if you want to change the size you can. :) Load the Cricut with card stock (portrait orientation) and cut the designs.

Note: You’ll notice that I used a standard mat for this project, but I would recommend the Light Grip Mats for Paper Products. This just happens to be one of my older mats that’s not quite so sticky anymore :)

DIY Heart Wine Glass Placecards #svgfiles #cricutprojects #placecards

3. Remove the card stock from the outer edge, leaving the hearts on the cutting mat.

DIY Heart Wine Glass Placecards #svgfiles #cricutprojects #placecards

4. Peel off each place card from the edge of the design, leaving the extra paper on the cutting mat. Repeat with all hearts, then remove and discard all the card stock left on the cutting mat.

DIY Heart Wine Glass Placecards #svgfiles #cricutprojects #placecards

5. Using your finger, create a bend horizontally on the card, not folding the card but pressing it with your fingers into a curved shape. This will make it easier to sit nicely on the glass.

DIY Heart Wine Glass Placecards #svgfiles #cricutprojects #placecards

6. Place on the glass with the cut out “tab” side of the heart on the inside of the glass. Once your guest information has been written, they can be stored until you are ready to place them on the glasses of your event! :)

DIY Heart Wine Glass Placecards #svgfiles #cricutprojects #placecards


Christmas Wine Bottle Labels

This post contains affiliate links, meaning that if you click on a link I will recieve a small comission. This costs you nothing extra and I only promote products I use and love! You can read our full disclosure here

PInterest Title.jpg

Tis the Season for Christmas Themed Wine Bottles! I had fun dressing up these bottles to take to a Christmas Party, but you could also use them for inexpensive gifts for friends! (Depending on the wine of course).

Neato Wine Bottle Labels
Christmas Wine Printable
Wine of Choice (Of course I would recommend a white given the text :) )

Supplies with text.jpg

1.     Download the Printable and Print your labels.

2.     Soak off the Label from your wine bottles with hot soapy water. Scrub any remaining residue off with a sponge and dry the outside of the bottles.

3.     Place the square label where the old label used to be and you are done!

completed bottles with text.jpg

I love the idea of giving one of these for a white elephant, mystery white wine! Never hurts to dress up cheap wine in a pretty label. :)

Harry Potter Wine Labels

This post contains affiliate links, meaning that if you click on a link I will recieve a small comission. This costs you nothing extra and I only promote products I use and love! You can read our full disclosure here

Pinterest 1.jpg

Harry Potter Wine Labels? What could be more fun for our Harry Potter Bachelorette Bash! When I was designing these, I had so much fun coming up with the names that I made one for four different types of wine! And just like the Bridesmaid Proposal Wine Bottles, these are as easy as peel, stick and done!

Instagram.jpg

Supplies:

Neato Wine Bottle Labels
Harry Potter Wine Printable
Wine of Choice (Labels are for Pinot Grigio, Chardonnay, Merlot and Cabernet Sauvignon)
 

Supplies.jpg

1.     Download the Printable and Print your labels. I have made them specifically for Chardonnay, Pinot Grigio, Cabernet Sauvignon, and Merlot because those are my favorites! (Yes, four favorite types of wine is totally acceptable)

2.     Soak off the Label from your wine bottles with hot soapy water. Scrub any remaining residue off with a sponge and dry the outside of the bottles.

Peeling Label.jpg

3.     Place the square label where the old label used to be and you are done!

placing label.jpg
finished bottle.jpg

This is a wonderful way to add some Halloween and Harry Potter fun to your wine and it really only costs as much as the wine and a set of labels. Want to design your own labels? The company that created these label sheets has an online design studio so you can always come up with a design all your own!

finished bottles with text.jpg

Harry Potter Martini Mixer Labels

This post contains affiliate links, meaning that if you click on a link I will recieve a small comission. This costs you nothing extra and I only promote products I use and love! You can read our full disclosure here

Pinterest 1.jpg

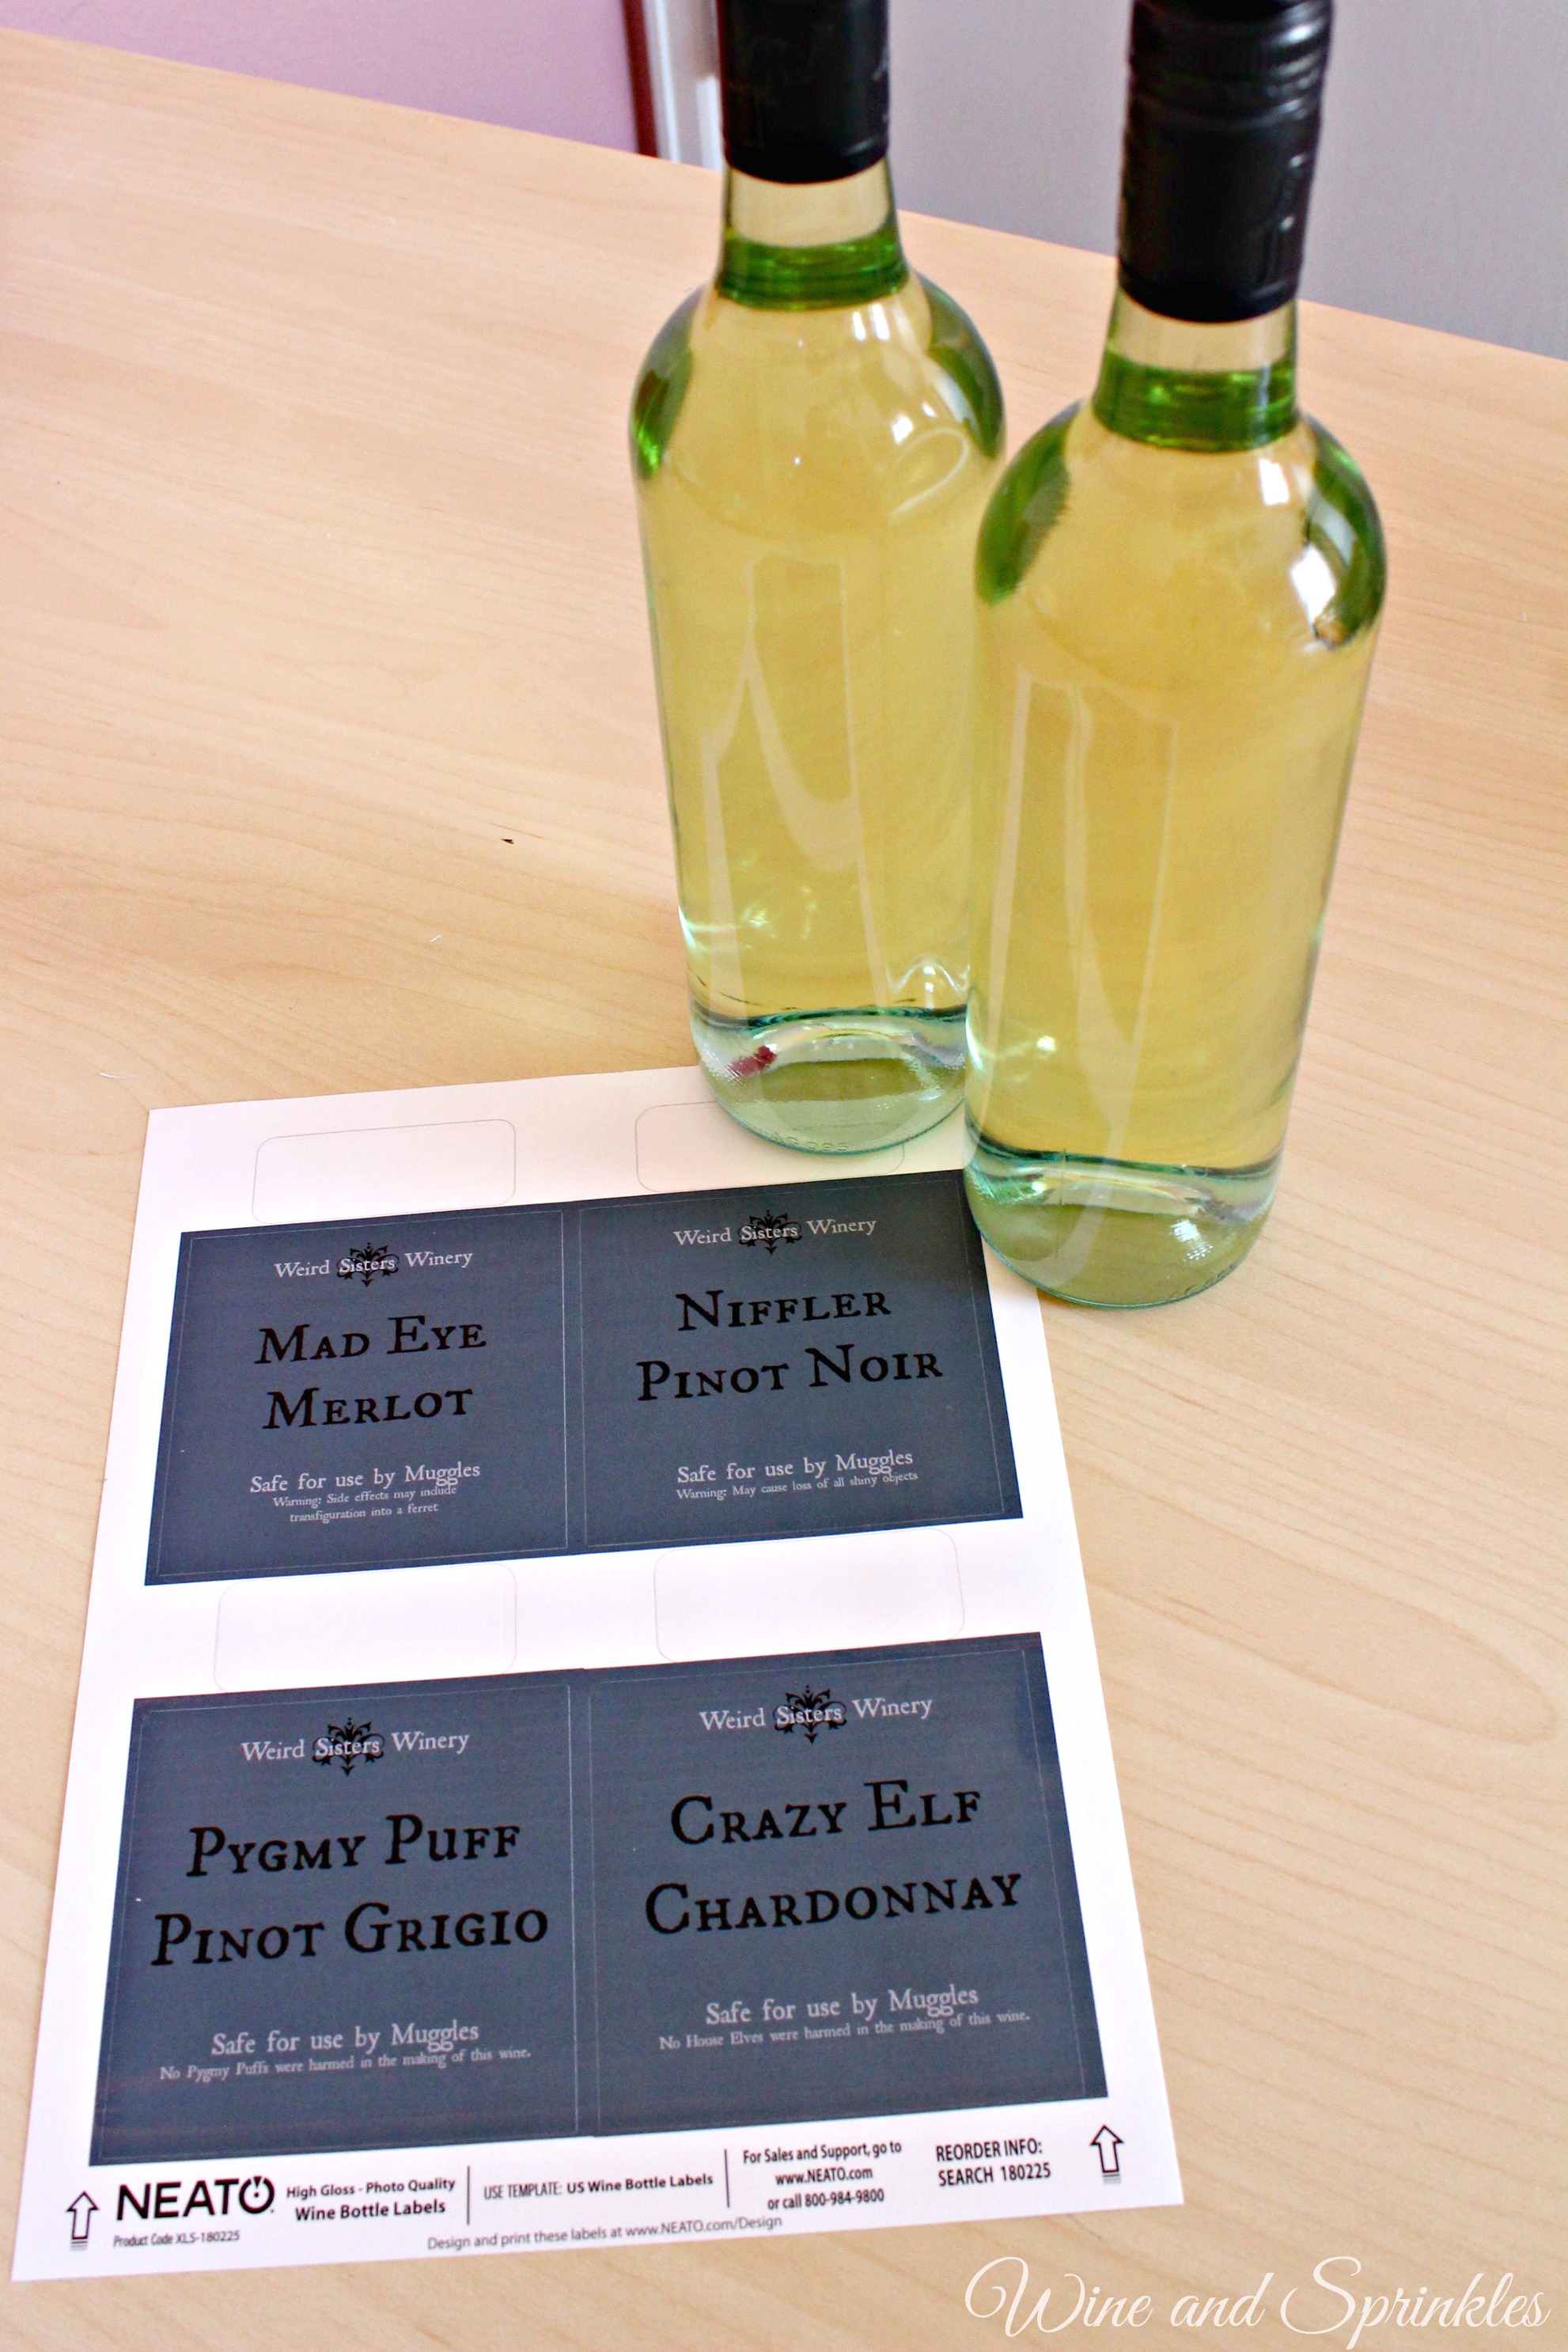
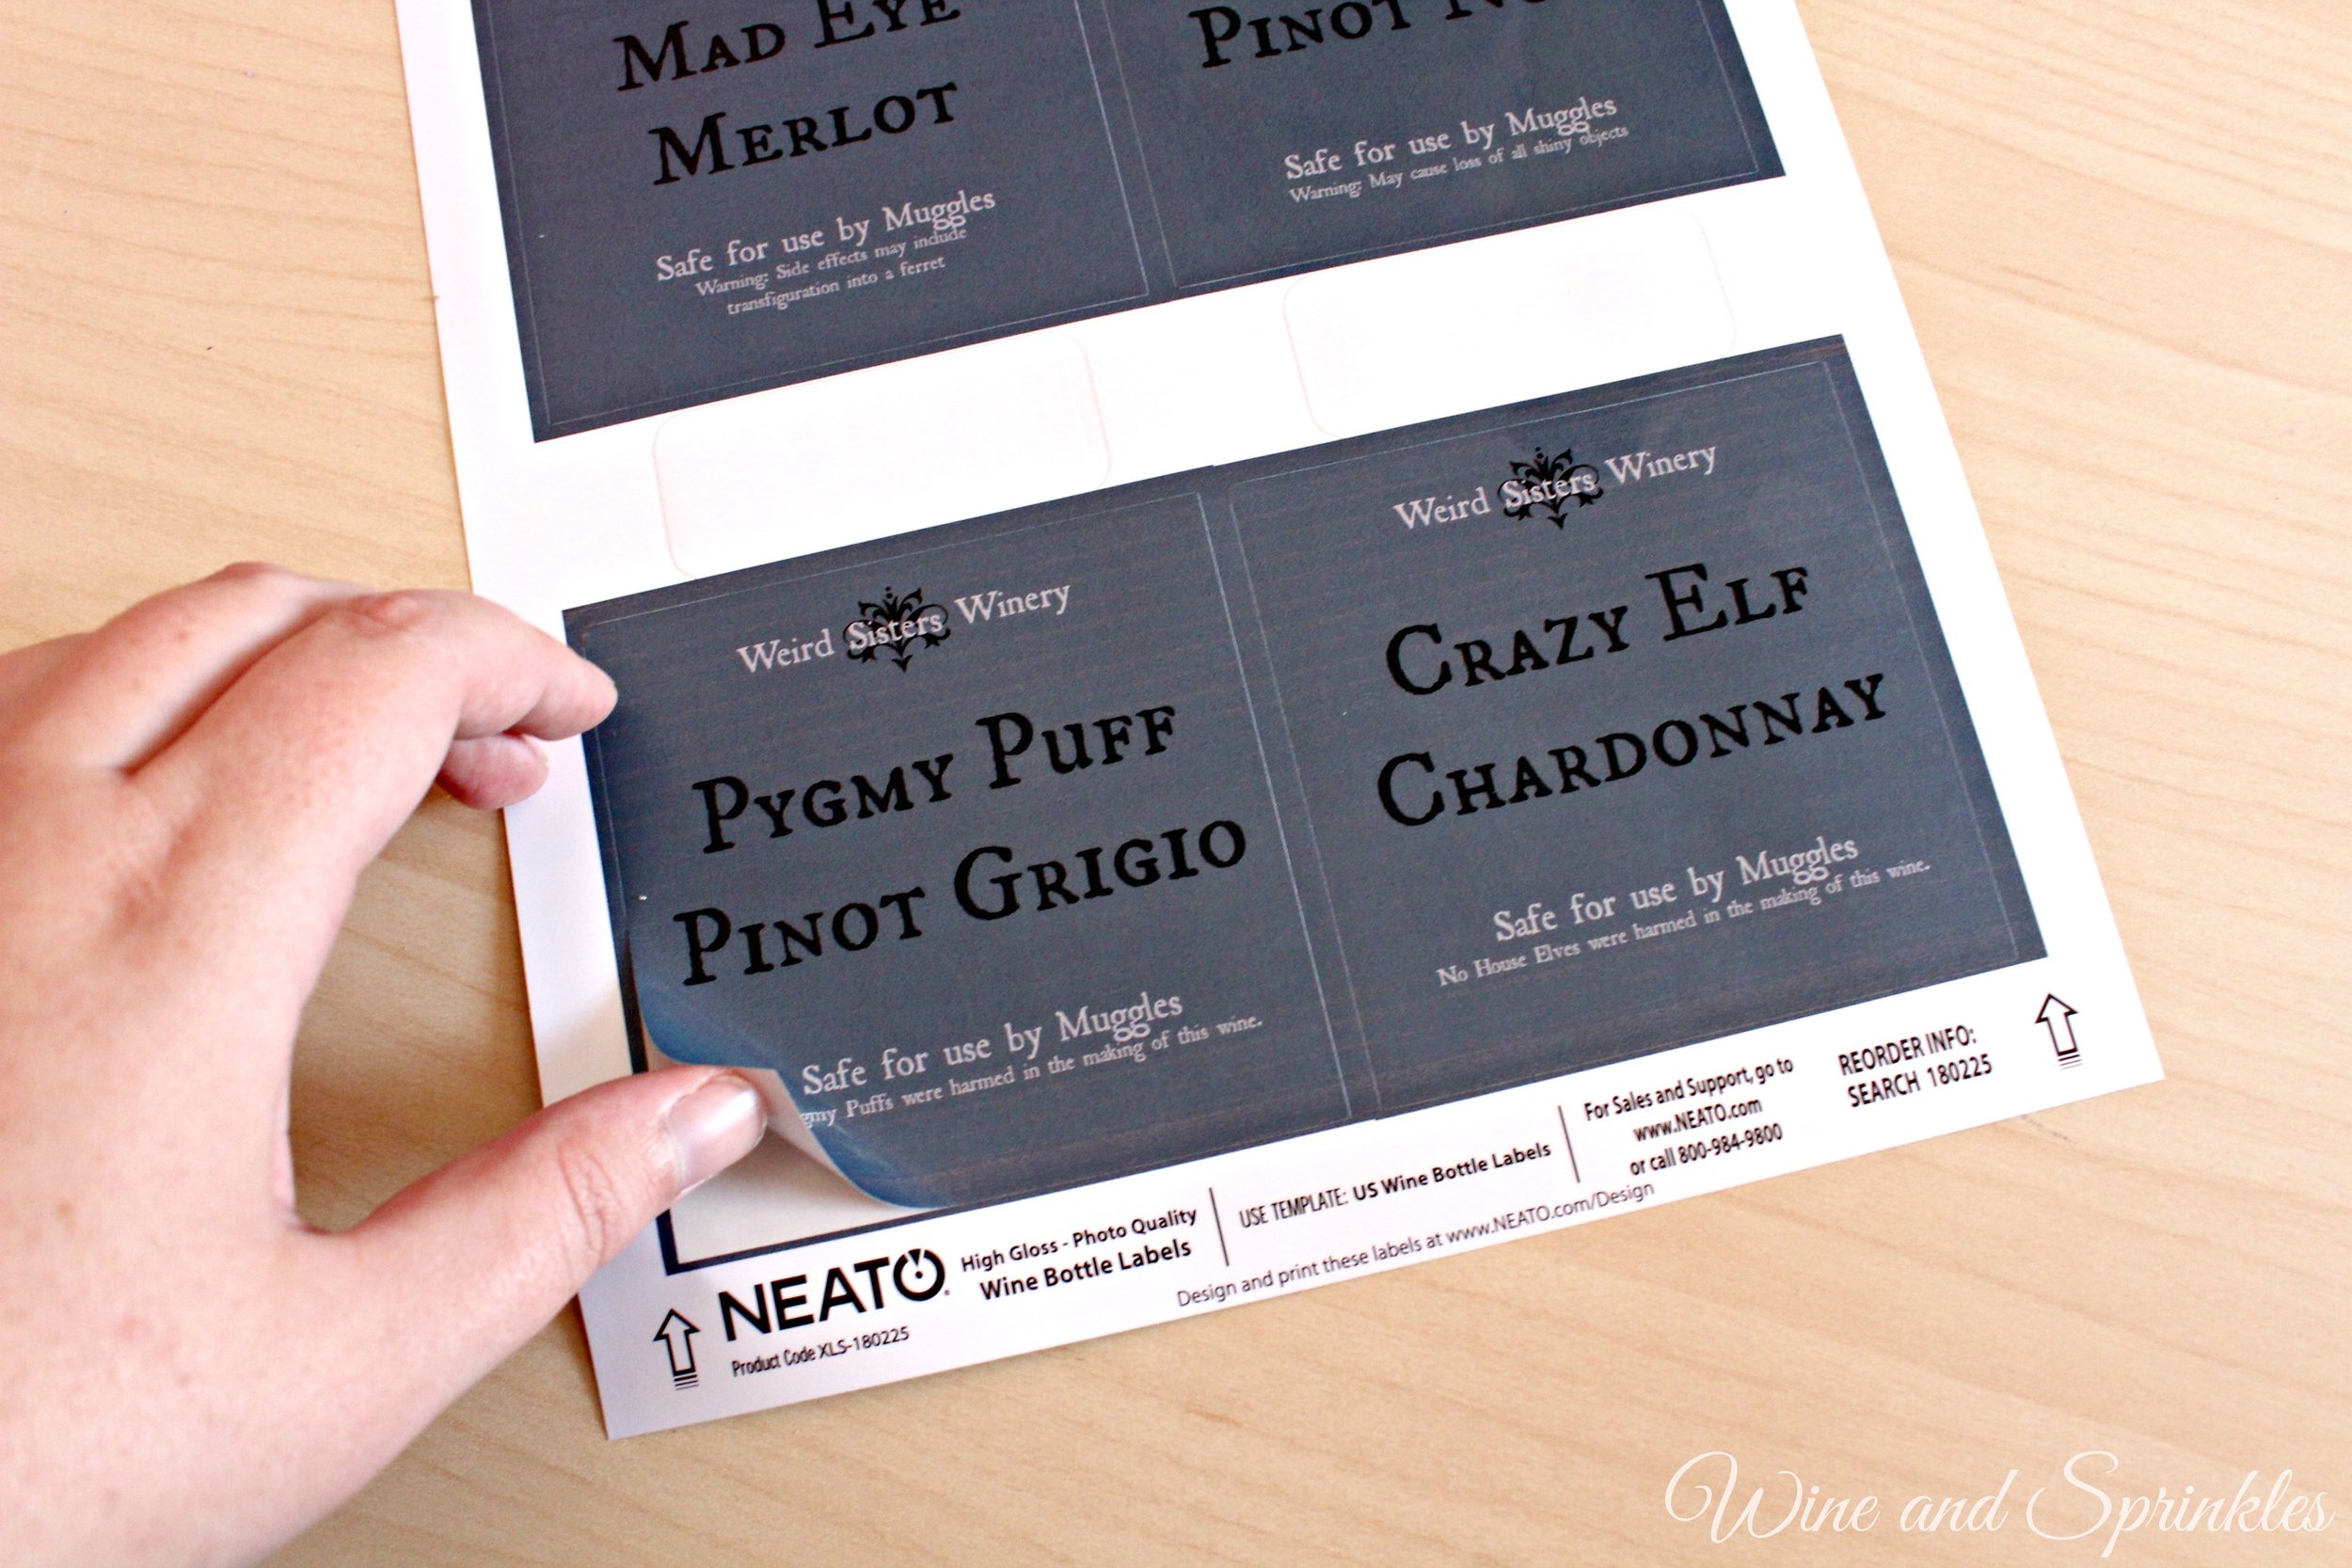
Happy Halloweentime everyone! To keep with the spooky spirit, its time for some Halloween style tutorials! First up are some labels and decorations I made for my friend's bachelorette party, which as luck would have it, was Harry Potter themed!

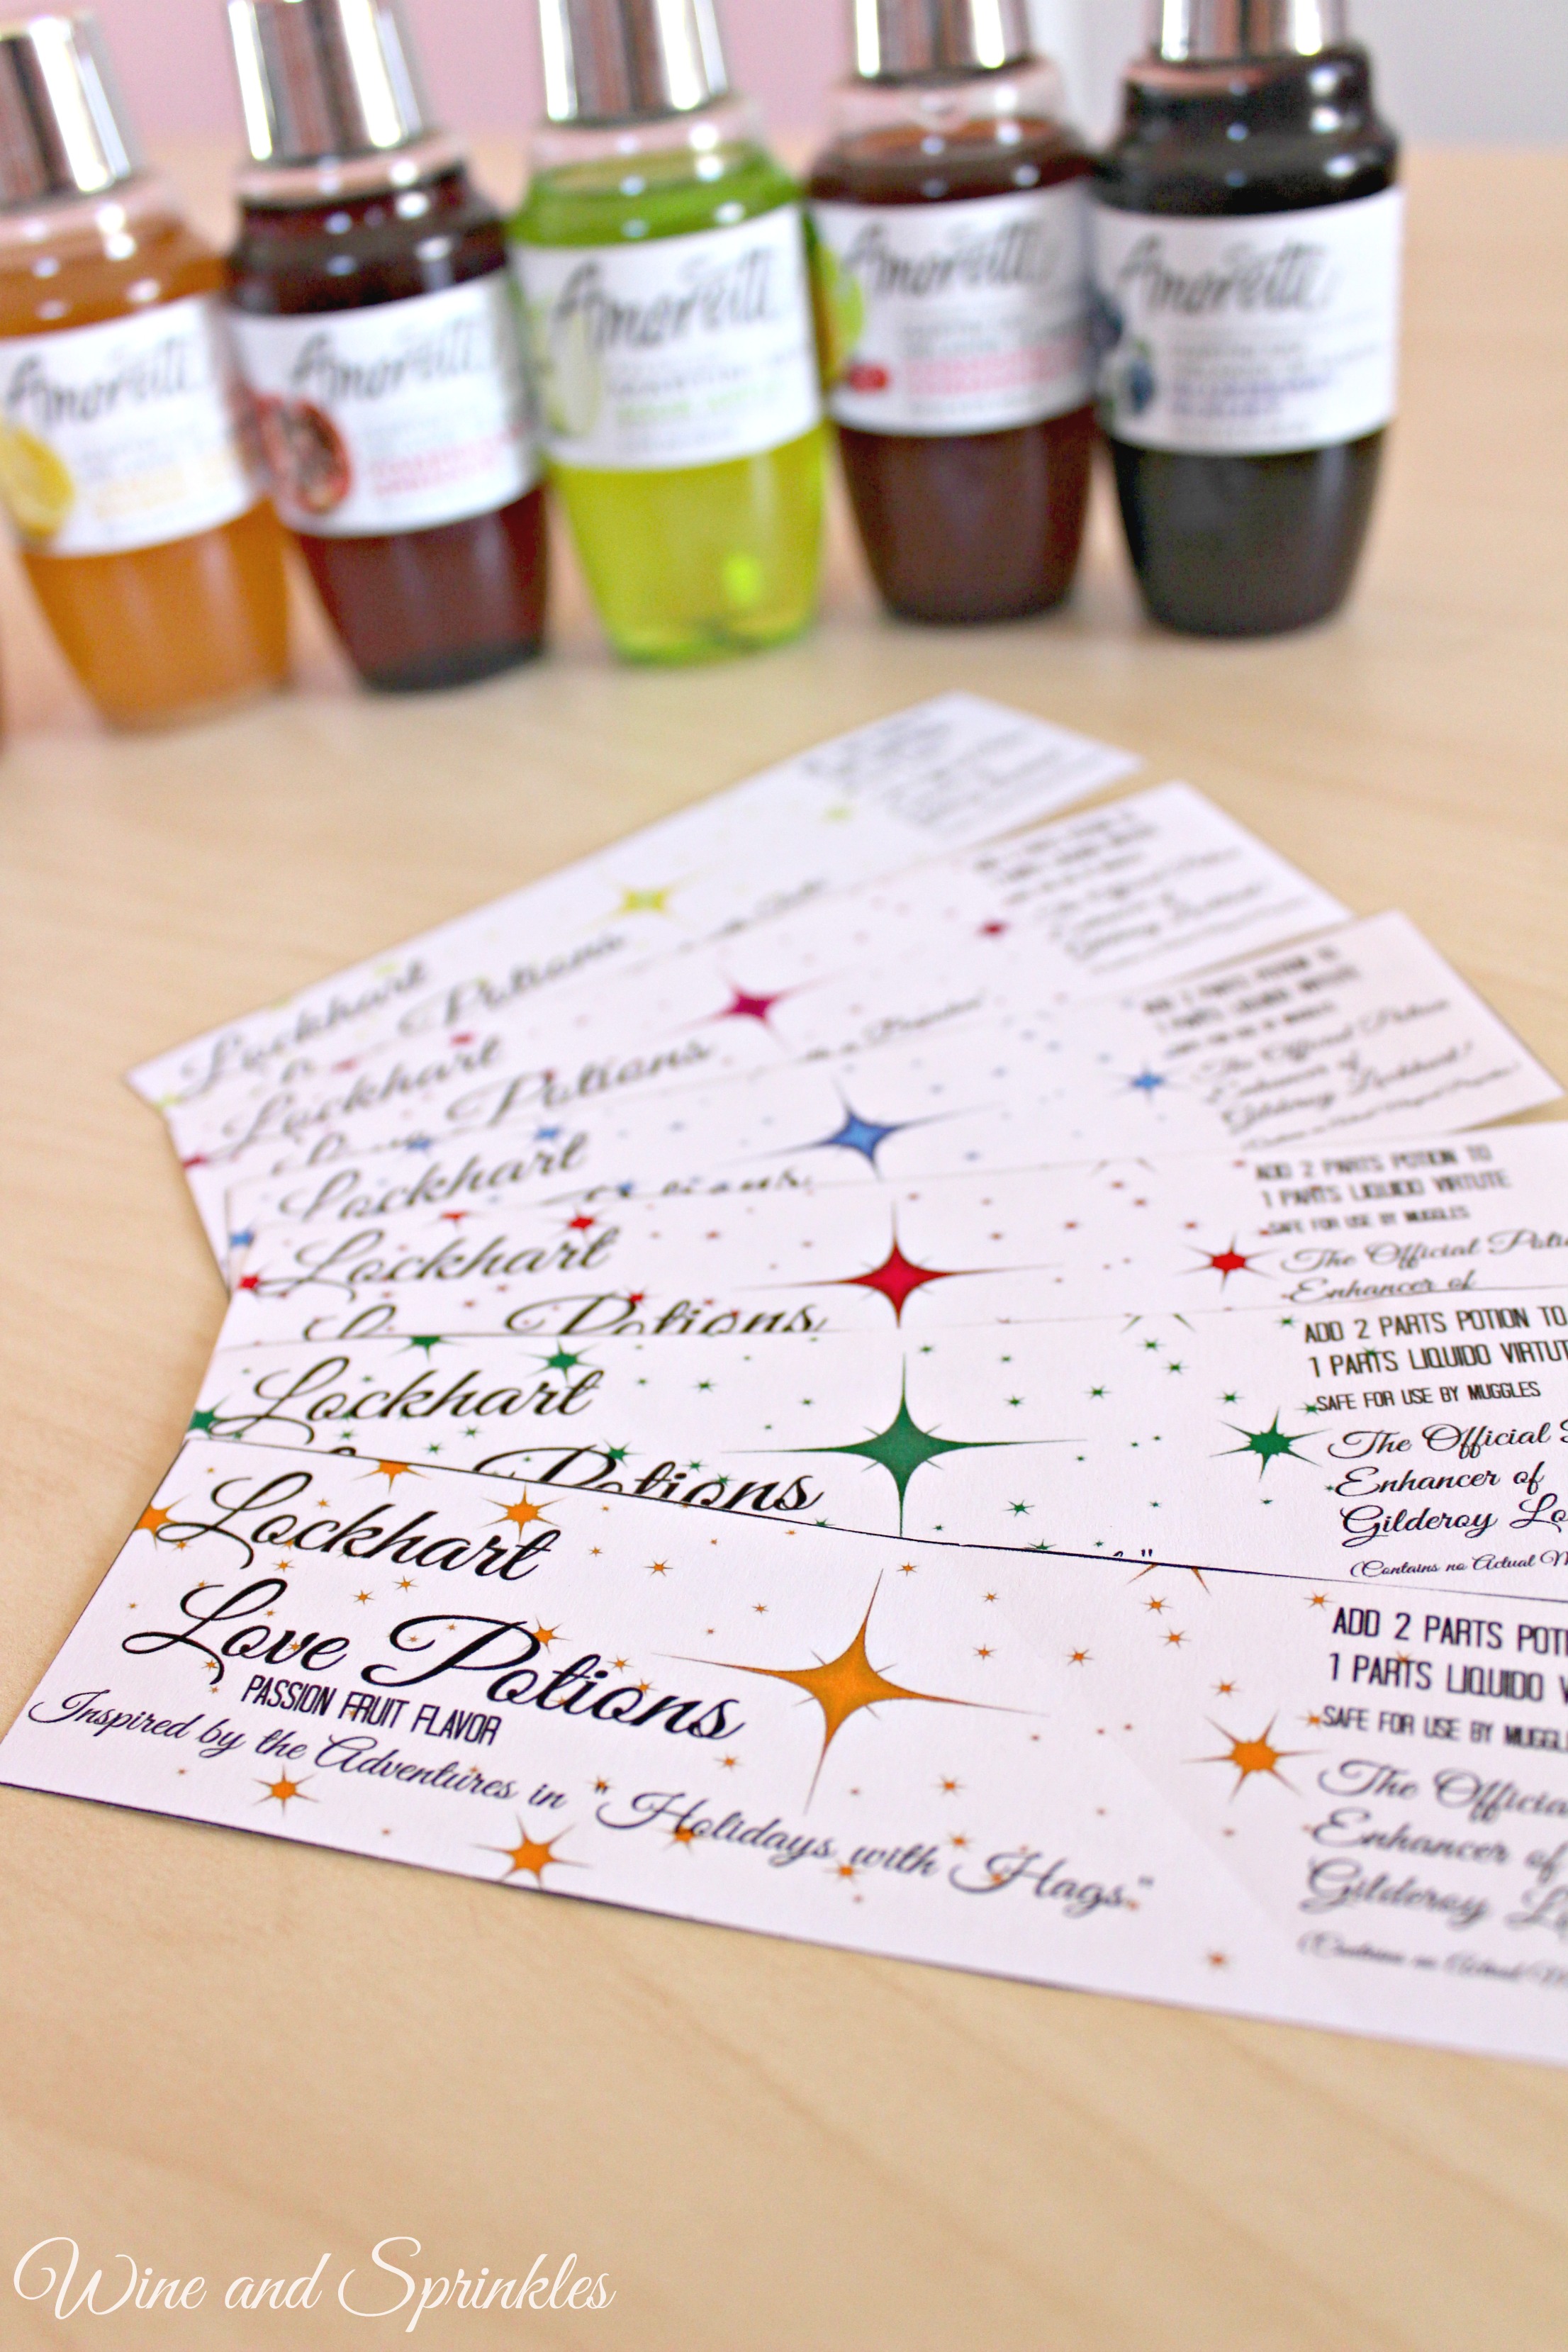
Since I was bringing martini mixers, wine and paper signs, I wanted them all designed for such a fun theme, so my question became, what wizard would sell martini mixers? Why Gilderoy Lockhart of course! Why?

#1 - He is beloved by ladies, ladies love martini mixers
#2- Lockhart would totally sell a mixer as a potion to his adoring fans

In true Lockhart fashion, each mixer is themed on one of his bestselling books, and for legalities they do in fact state that they “contain no magical properties” (Not that anyone who knows Gilderoy would assume they work). I ended up buying a set of martini mixers from Amazon which are what I designed my stickers to and it was perfect for having a selection of martini mixers for the bachelorette party.

Finished Potions 3.jpg
finished potion.jpg
supplies.jpg

1.     Print out Labels on Sticker Paper. Cut out with Scissors.

peeling labels with text.jpg

2.     Peel off the existing Martini Mixers and replace with the new Lockhart Labels. The original flavors are also on the new labels so I found it easiest to take off the old label and replace it one bottle at a time so that I didn’t get mixed up and put the wrong label on the wrong bottle.

placing labels.jpg

And it’s as easy as that! I love being able to add little touches to themes like this with bottle labels, cheap and super cute! What Harry Potter Themed drinks would you make?

finished potions 2.jpg

Paper Wine Glass Escort Cards

This post contains affiliate links, meaning that if you click on a link I will recieve a small comission. This costs you nothing extra and I only promote products I use and love! You can read our full disclosure here

DIY Printable Wine Glass Place Cards #diywedding #cricutproject #cricut

For the second wedding I helped with the bride wanted an escort card that could be placed in a small wine glass, which also happened to be the favor. With purple and silver as the colors and hearts as the escort card theme, I was off! I made these escort cards so that they could be hand written with the name and table number, but they would work best for a buffet meal so that you don’t have to find room to put people’s meal choices on there!

These escort cards also gave me the chance to try one of the features of my Cricut that I had never worked up the courage to use: the print to cut feature. And now that I have used it, I’m never going back! It made it so much easier to cut out the odd shape of these cards that I’m going to start designing wedding and party invitations for it to cut out too!

DIY Printable Wine Glass Place Cards #diywedding #cricutproject #cricut

The wine glasses used were a little smaller than normal, so make sure to check the wine glasses you are using and size your cards appropriately.

Supplies:
White Cardstock
Craft Cutter and Tool Set
Adhesive Mat
Escort Card Cut File

1.     Import the cut file into the Cricut Desing Software. In this case, make sure to click outside the design to remove the white background from around the card, leaving the inside white.

2.     Save the file as a “Print to Cut” File and then import it into your project. I made my cards 3.25” wide which fit 3 to a sheet. These fit wine glasses that were 3.75” tall with a 2.25” opening. While I don’t know where they got their wine glasses, here are some cute ones from Beacoup that are the same size!

DIY Printable Wine Glass Place Cards #diywedding #cricutproject #cricut

3.     Once you are ready to cut, go to the cut menu and print the number of sheets you need. I kept the “bleed” option check so that it will print the color slightly past the cut line so that the color is seamless on the edge. You can only print 10 at a time, but luckily by saving your cards as a project you can print them all and cut them later if you choose by selecting the same project.

DIY Printable Wine Glass Place Cards #diywedding #cricutproject #cricut

4.     Once they are printed, affix your cardstock, 1 sheet at a time, to your cutting mat (I used a light grip mat) and cut them out with your Cricut. The Cricut will scan for the bold black lines printed around and then cut based on that scan. In my mind I was sure this wouldn’t work for some reason but it worked like a charm!

DIY Printable Wine Glass Place Cards #diywedding #cricutproject #cricut

5.     Once all your cards are cut, handwrite guest names and tables onto the cards. Place in wine glasses when ready to present.

DIY Printable Wine Glass Place Cards #diywedding #cricutproject #cricut

Once you get a hang of the print to cut feature (which will happen in the first 10 minutes of trying it) it’s just a matter of getting all the cards cut out. The Cricut makes such short work of the cutting. Even with the extra time it takes to scan, it could cut 12 cards in the time it took me to cut 3 by hand (and the Cricut cards were far better).  These turned out super cute and can easily be used for other weddings as well, and the best part is that, since they have a “stem” inside the wine glass, they don’t blow away in the wind! :) What did you use as escort cards for your wedding?

DIY Printable Wine Glass Place Cards #diywedding #cricutproject #cricut

Vellum Paper Rose Escort Card Holders

This post contains affiliate links, meaning that if you click on a link I will recieve a small comission. This costs you nothing extra and I only promote products I use and love! You can read our full disclosure here

DIY Paper Rose Place Cards #diywedding #cricutproject #placecards

With all my leftover roses from the Beauty and the Beast Shower, I have been looking for a new home for them. Luckily, they worked out perfectly for my sorority sister’s Rustic Glam Gold Wedding! Her main flowers are white roses, so these beauties were the perfect accent to go with her existing floral arrangements. With that in mind, we decided these would be perfect as place card holders for her guests!

While the assembly of the flowers is the same as in the previous Vellum Roses post, there are a couple other steps to make them the perfect escort card holders. In particular, I used vinyl to color the leaves a pretty metallic gold to go with the wedding colors and then secured each place card with double sided tape to ensure that they all stayed with their flowers and were easy to set up the day of!

Supplies:
Cream Vellum
Paper Modgepodge
Hot Glue Gun and Glue Sticks
Escort Cards (I printed mine on cardstock and cut them into 2” x 3” rectangles)
Gold Vinyl (optional)

1.     Print, cut out, and assemble the roses like in the Vellum Roses tutorial. Take care to not fold or attach the leaf portions to your flowers yet.

DIY Paper Rose Place Cards #diywedding #cricutproject #placecards

2.     Design, print, and cut out your escort cards (I used the font Good Vibes and Bebas Neue). Using double sided tape, tape the back of the card to the front of one of the petals. I generally taped mine a few petals out from the center were the card was clearly readable. Once you have all your cards taped, set the flowers aside but try to keep them in whatever order you want them placed for the wedding.

3.     If you are using vinyl on your leaves, remove backing from your vinyl and lay it down on your work surface, adhesive side up. Arrange as many leaves as you can on the sheet and smooth them down, making sure there are no air bubbles. Using scissors, cut leaves out of the vinyl.

DIY Paper Rose Place Cards #diywedding #cricutproject #placecards

4.     Fold two of the three leaves as shown in the original tutorial. For the third leaf, fold in the opposite way as the other two leaves so that it will prop up the back of the flower.

DIY Paper Rose Place Cards #diywedding #cricutproject #placecards

5.     Using hot glue, attach the leaves to the flowers, making sure the “proper” leaf is in the back, perpendicular to the escort card.  (Sorry these are a little blurry!)

DIY Paper Rose Place Cards #diywedding #cricutproject #placecards

I wasn’t sure how I’d feel about the leaves being gold but as it turned out I adored it! With the roses being a little translucent themselves the gold leaves gave a magical quality to the roses, which of course I loved! I ended up being able to pack them up in a box with glass dividers so that they would move around and would stay in order for their trip up to their mountain wedding. What would you use for your escort cards?

DIY Paper Rose Place Cards #diywedding #cricutproject #placecards

Beers and Bowties Groomsmen Invitations

This post contains affiliate links, meaning that if you click on a link I will recieve a small comission. This costs you nothing extra and I only promote products I use and love! You can read our full disclosure here

Beers and Bowties Groomsman Proposal #willyoubemygroomsman #bestman #groomsman

Is it just me or does it seem like groomsmen get the short end of the stick in the “getting invited” department? Granted, they don’t generally have to put in the same hours as the bridesmaids but they should certainly get a fun invitation too!

Beers and Bowties Groomsman Proposal #willyoubemygroomsman #bestman #groomsman

This idea actually came to me while I was designing my Bridesmaid Wine Labels as I was trying to think of a fun, cheap way to invite the groomsmen with a similar theme. Enter this dashing 6 pack of beers, bow-tying up for the occasion!

There are two parts to this tutorial, making the bowties and covering and labelling the 6 pack holder. I don’t think its necessarily required to cover the 6 pack holder itself, but I did just for fun and a Cricut makes this an easy and quick project for inviting your groomsmen. The best part about the bow ties is that you can pick your pattern so each 6 pack doesn’t have to match, but instead can be themed to each groomsmen. I just used extra scrapbook paper I had and they turned out super cute!

Beers and Bowties Groomsman Proposal #willyoubemygroomsman #bestman #groomsman

Supplies:
6 Pack of Beer
Colored Paper for Bowties
Adhesive Vinyl (I used Black and Gray for the background and White for the Words)
Tape
Transfer Paper
Craft Cutter and Tool Set
Adhesive Mat
Bow Tie Cut File
6 Pack Label Cut File

Covering the Holder:

Beers and Bowties Groomsman Proposal #willyoubemygroomsman #bestman #groomsman

1.     Pick the Background Color for your 6 pack holder. I did mine half gray and half black so that you can see the way it looks with different bowties.

2.     Lay the holder flat onto the back of the vinyl sheet and trace around the top and sides. Cut the Vinyl along those lines with scissors.

Beers and Bowties Groomsman Proposal #willyoubemygroomsman #bestman #groomsman

3.     Peel and Stick the vinyl to the sides of the holder. I made mine a little longer just in case and then trimmed off the excess vinyl when I was done to about ½” above the holder. Once trimmed, I folded the vinyl over the edges of the holder to create a smooth line.

Beers and Bowties Groomsman Proposal #willyoubemygroomsman #bestman #groomsman

4.     Once your holder is covered, import the 6 pack label file into the Cricut Design Software. Measure the height of your holder and resize the image to 1” less than that height (I made mine 5” ).

Beers and Bowties Groomsman Proposal #willyoubemygroomsman #bestman #groomsman

5.     Cut out the design in your chosen color and weed out the excess vinyl. Using Contact Paper, transfer the label to the 6 pack holder.

Beers and Bowties Groomsman Proposal #willyoubemygroomsman #bestman #groomsman

Making Bowties:

1.     Upload the Bow Tie Cut File into the Cricut Design Software.

2.     Cut out bowties with you Cricut craft Cutter. I was able to get 6 bowties per sheet so each piece of paper can be used for one 6 pack. I would highly recommend using the light grip adheasive mat (its purple) so that you don’t have to worry about the paper sticking to your mat too much and ripping when you try to remove them.

Beers and Bowties Groomsman Proposal #willyoubemygroomsman #bestman #groomsman

3.     Remove your bowties from the mat. Using the smaller rectangular piece, fold around the center of the bowtie and tape the two edges together, so that the longer collar piece can be threaded through the center.

4.     Thread the long rectangular collar piece through the loop, with the pretty side of the paper facing towards the back of the bowtie.

Beers and Bowties Groomsman Proposal #willyoubemygroomsman #bestman #groomsman

5.     Wrap the Bowtie around your beer bottle, once you have the bowtie positioned how you want it; tape the ends of the collar together. Repeat for all remaining bowties and bottles.

6.     Once completed, put all the newly bowtied beers back into the holder and its ready to go!

Beers and Bowties Groomsman Proposal #willyoubemygroomsman #bestman #groomsman

As you can see, these are easy and quick to make if you have a craft cutter, just buy your guys their favorite 6 pack, cut, tape, and you’re ready to go! Plus, these boys have to put up with a lot of wedding craziness for the next couple months, never hurts to start it off with a beer. :)

Beers and Bowties Groomsman Proposal #willyoubemygroomsman #bestman #groomsman

Bridesmaid Proposal Wine Labels

This post contains affiliate links, meaning that if you click on a link I will recieve a small comission. This costs you nothing extra and I only promote products I use and love! You can read our full disclosure here

Bridesmaid Wine Label Pin.jpg

What Bridesmaids wouldn’t appreciate a bottle of wine to toast to the new wedding journey? I love the idea of giving a bottle of wine; it’s always appreciated and is not that expensive compared to the other bridesmaids invitation options out there. I must say I bought a bunch of swag for my maids to invite them, and while I don’t regret it in the least (they did A LOT of DIY) most people don’t want or need to drop a bunch of cash on their bridal party invitations.

Making these Bridal Party Invitations is very straightforward and turned out so cute! I would recommend wines in clear bottles for the labels to show to their best advantage, but you can use them on most any wine bottle you like!

Finished Label Pin 2 with text.jpg

Supplies:
Wine Bottle Labels
Wine Label Printable
Wine of Choice

1.     Download the Printable and Print your labels. I have made them specifically for Chardonnay wine bottles but you can always use something else and not use the top strips. :)

Supplies with text.jpg

2.     Soak off the Label from your wine bottles with hot soapy water. Scrub any remaining residue off with a sponge and dry the outside of the bottles.

3.     Peel off the label and affix it to your cleaned bottle. I found the edge of the bottle and used the vertical line to line up my label so it would be level.

Labelling Collage.png
finished labels no gems.jpg

4. If using the Chardonnay labels, wrap them around the top where the foil meets the bottle.

Chardonnay Collage.png

5.     Optional: Glue on a few clear and pink gems to give your bottles some extra sparkle! I just used regualr tacky glue and some extra gems I had lying around from previous bachelorette parties. :)

This is a wonderful way to invite your maids and it really only costs as much as the wine and a set of labels. Want to design your own labels? The company that created these label sheets has an online design studio so you can always come up with a design all your own!

Beauty and the Beast Bridal Bingo

This post contains affiliate links, meaning that if you click on a link I will recieve a small comission. This costs you nothing extra and I only promote products I use and love! You can read our full disclosure here

One of my favorite Bridal Shower Games is the ever popular “Bridal Shower Bingo.” Guests are given cards of potential gifts that the Bride-to-Be could receive and mark them as she opens her gifts. I particularly like it because it keeps everyone engaged in the present opening time during every shower, which can tend to be hard to pay attention to.

Many times, Bridesmaids will use items they see are purchased on the bride’s registry to form the game cards, but for this theme I took it in a different direction. Instead of specific items, instead I have descriptions of item categories that you can mark off based on how well whatever was unwrapped fits into the category. I did a similar game card for a baby shower last year and guests had a lot of fun discussing what “counted” and what didn’t!

Similar to the “Match the Couple” Printables, these are a simple print, cut on the black line, and hand out! I have made a set of 24 potential cards plus a blank copy that you can to have people fill in what they think the Bride will open before the game starts!

Download the Printable Here
Download the Blank Printable Here

Beauty and the Beast Match the Couple Bridal Shower Game

This post contains affiliate links, meaning that if you click on a link I will recieve a small comission. This costs you nothing extra and I only promote products I use and love! You can read our full disclosure here

“Match the Couple” games are a standby at Bridal showers, where guest match together celebrity or other famous couples.  I always think it is a great addition for a shower as an easy game that doesn’t require a lot of prep!

Inspired by Belle’s love of books, all of my match ups are couples in novels throughout the years! I kept the same rose design as the Tea Favors and have the file formatted for two game cards per page. I would’ve made a tutorial but this was so simple it seemed silly. Just print them out on paper or card stock, cut along the black line, and you’re done! I love giving away Teacup Candles as prizes for games and they go along perfectly with the Beauty and the Beast Theme! Now the better question is: do you know all the books these characters are in? :)

Download the Printable Here
Download the Answer Sheet Here